About the Administrator Settings
As the name implies, these settings are only visible by users with Administrator privileges. All the settings on this page are accessible by entering Confluence settings and then clicking on the "Team Files" link on the sidebar under the "Configuration" section.
Allowed storage places
By default, users can connect folders from all the storage places supported by the Team Files app.
Administrators can easily restrict the usage of specific storage places to ensure that the usage of the Team Files aligns with the company policies.
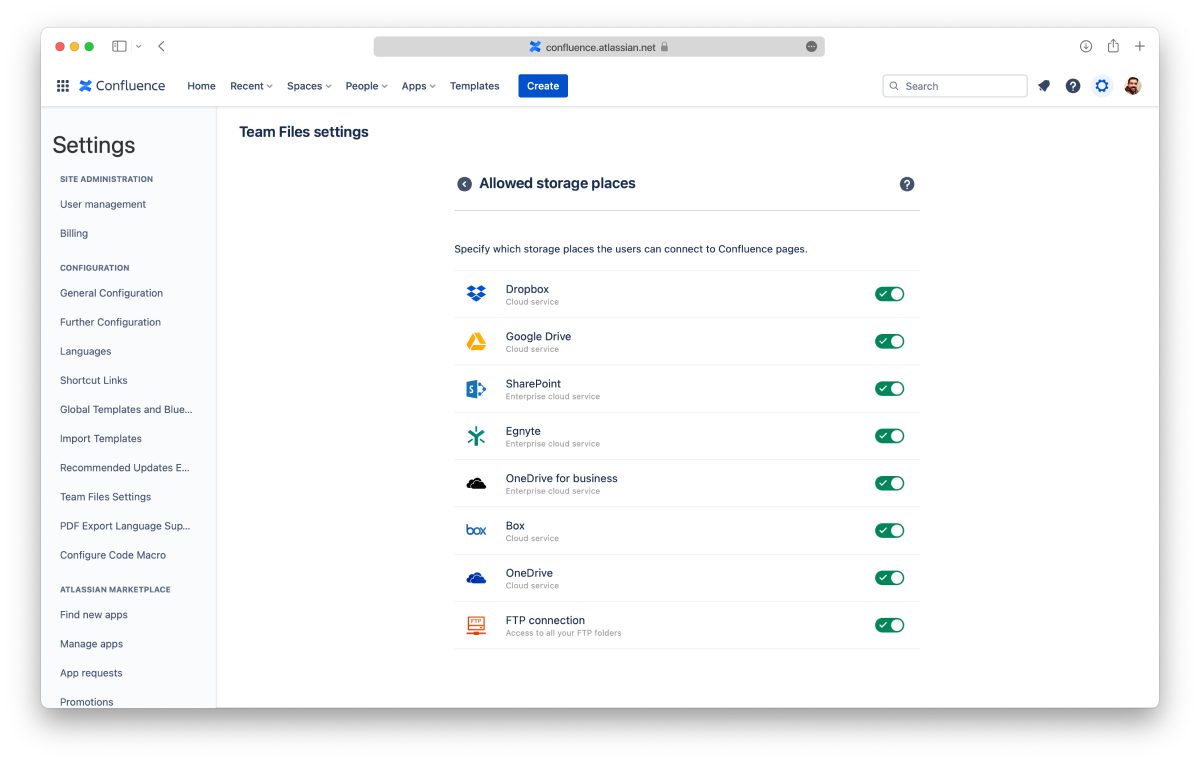
The options to connect clouds may be different depending on the app you installed. Example: Dropbox or Google Drive dedicated apps.
Disable a storage place for all users
Click the "Places" tab on the Team Files settings page
Click the switch on the storage places you want to disable
The switch changes to the off position to indicate the storage place was disabled, and users can no longer connect folders from that storage place.
Changes to these settings save automatically and apply immediately.
What happens to places the users connected before the Admin disabled them?
If a user connected a folder from a storage place that the Admin later disables, it is blocked inside the Team Files app. All connected folders from that place are blocked too, and if there are attached folders and files from a blocked storage place, the content won't be visible, and they'll display a warning mentioning the Admin blocked the access.
Re-enable a storage place for all users
Click the "Places" tab on the Team Files settings page
Click the switch on the disabled storage place you want to re-enable
The switch changes to the on position to indicate the storage place is enabled, and users can connect folders from that storage place again.
Changes to these settings save automatically and apply immediately.
Permissions for editing documents on SharePoint and OneDrive
Admins can select which permissions need to be respected when editing documents stored in Sharepoint and OneDrive.
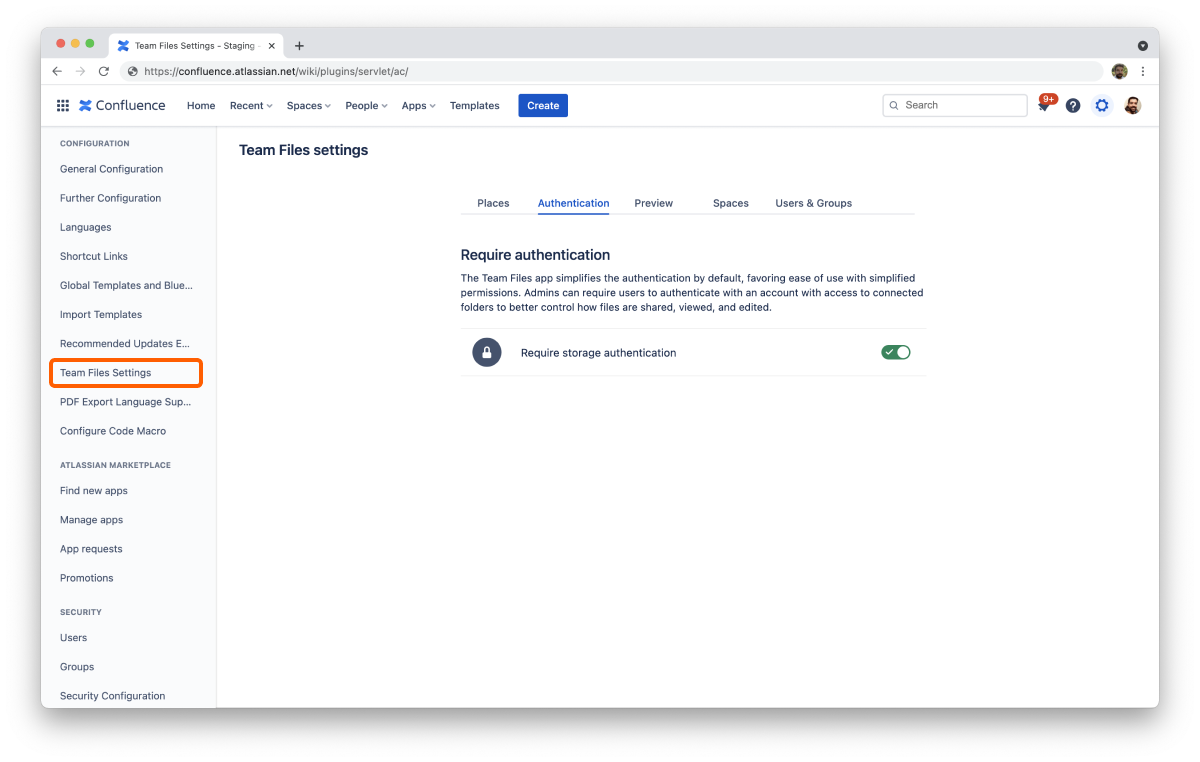
As a default, the Team Files app follows the permissions set on the app and in Confluence.
Alternatively, Admins can set the Team Files app to use permissions set for users on Sharepoint and OneDrive, by selecting the "SharePoint and OneDrive" option. Keep in mind that this option requires that users sign with their Office 365 accounts, so the correct permissions are applied to each user.
Select permissions for editing documents on SharePoint and OneDrive
Click the "Edit" tab on the Team Files settings page
Click the desired option
Changes to these settings save automatically and apply immediately.
Attachments preview
By default, the files and folders attached to Confluence pages appear in the collapsed view to use less space on the screen. It's easy to preview the file by clicking the arrow to open the expanded view.
However, an Admin can set the default to the expanded view so that the preview is immediately visible.
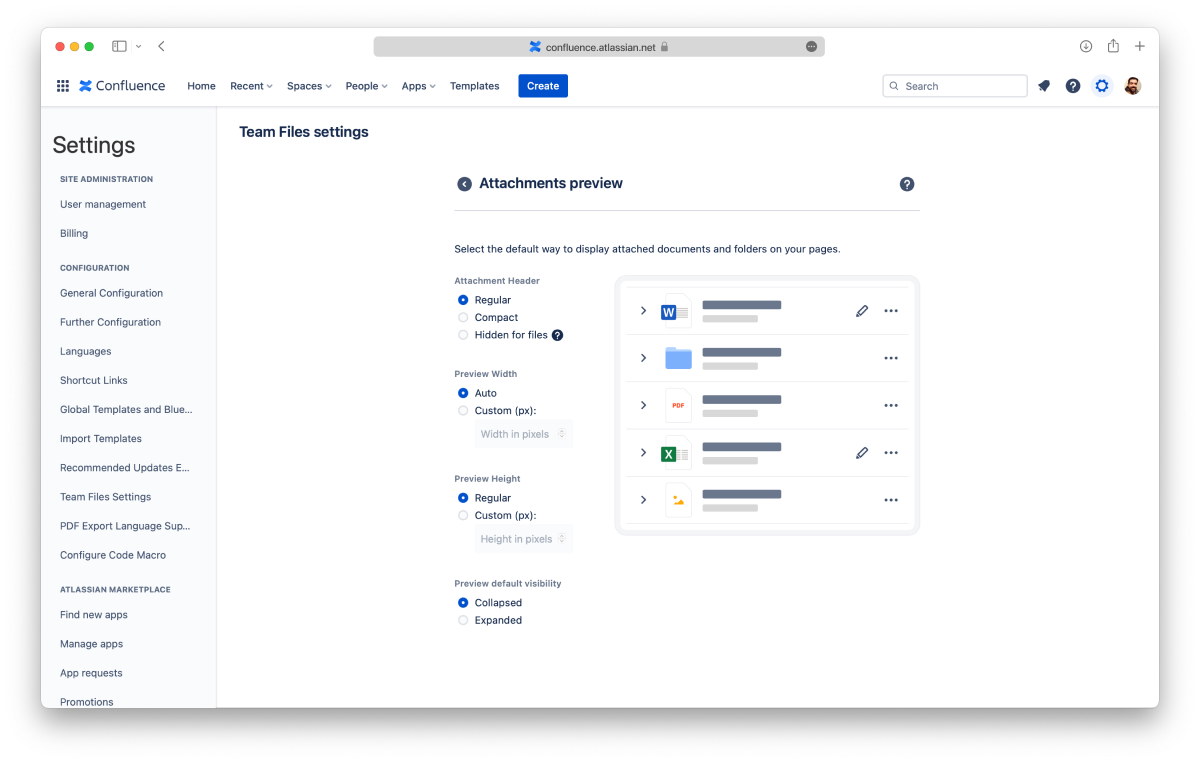
Select the default way to display the attached documents and folders on your pages
Click the "Preview" tab on the Team Files settings page
Click the desired option
Changes to these settings save automatically and apply immediately.
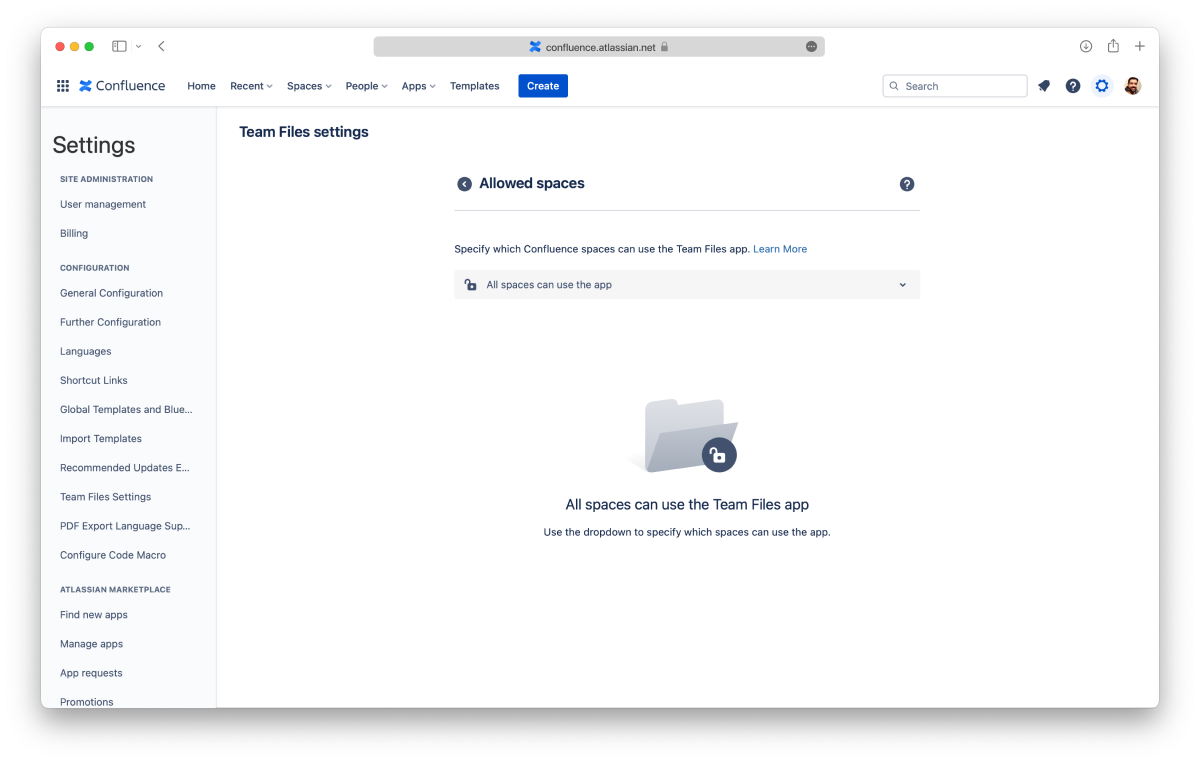
Allowed Spaces
By default, the Team Files app is available to be used in all spaces. It’s accessible with a link on the space sidebar and as a macro on pages to attach files and folders.
However, an Admin can specify which Confluence spaces can use the Team Files app. When a space doesn’t have permission to use the app, the file manager and the macro are hidden.
In the "Spaces" tab, you can see the current settings. There are three main options that you can select from the drop-down menu:
Option 1: All spaces can use the app (default option)
It is the default option and means that every space has access to the Team Files app.
Option 2: Only selected spaces can use the app
Select this option if you only want to allow the Team Files app for some spaces.
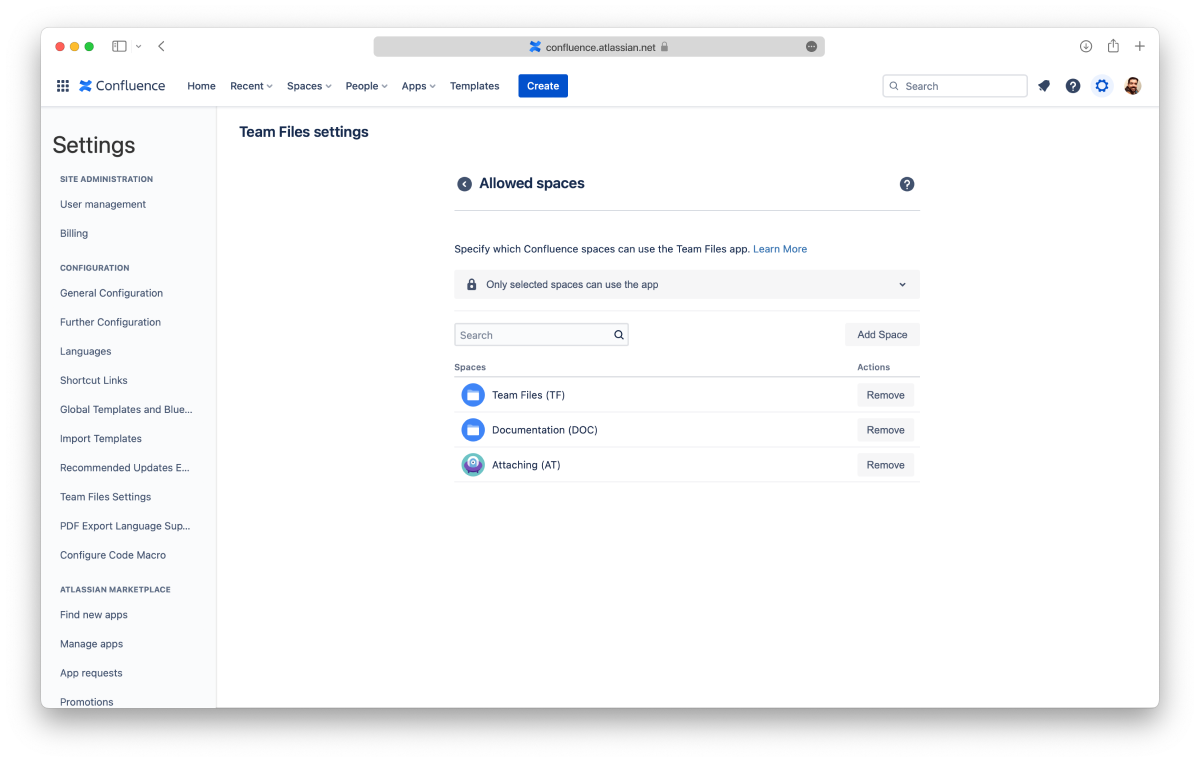
Adding a space:
Click the “Add Space” button, start typing to select a space, and click the “Add” button. The space gets access to the app immediately.
Removing a space:
Search for the space you want to remove, click the “Remove” button and confirm. The app is hidden from the space immediately.
Option 3: The selected spaces can’t use the app
Select this option if you only want to hide the Team Files app for some spaces.
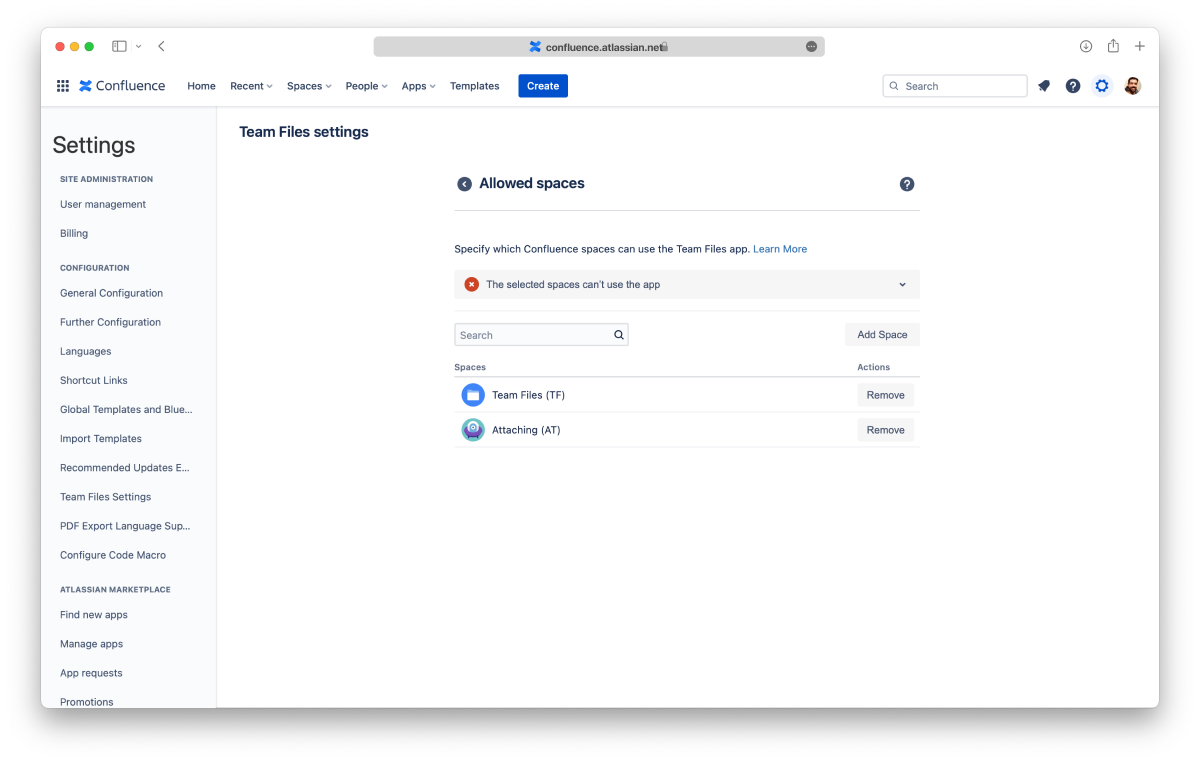
Adding a space:
Click the “Add Space” button, start typing to select a space, and click the “Add” button. The app is hidden from the space immediately.
Removing a space:
Search for the space you want to remove, click the “Remove” button and confirm. The space gets access to the app immediately.
Disabling the Team Files app on space already using it hides the file manager link and all the attached files and folders to issues. The attachments will be there if the app is re-enabled.
Space owners can also toggle on/off the Team Files app, as long as allowed by the admin.
Allowed users and groups
By default, the Team Files app can be used by all users and groups. It’s accessible with a link on the project sidebar and as a macro on pages to attach files and folders.
However, an Admin can specify which users and groups can use the Team Files app. When someone doesn’t have permission to use the app, the file manager and the macro are blocked.
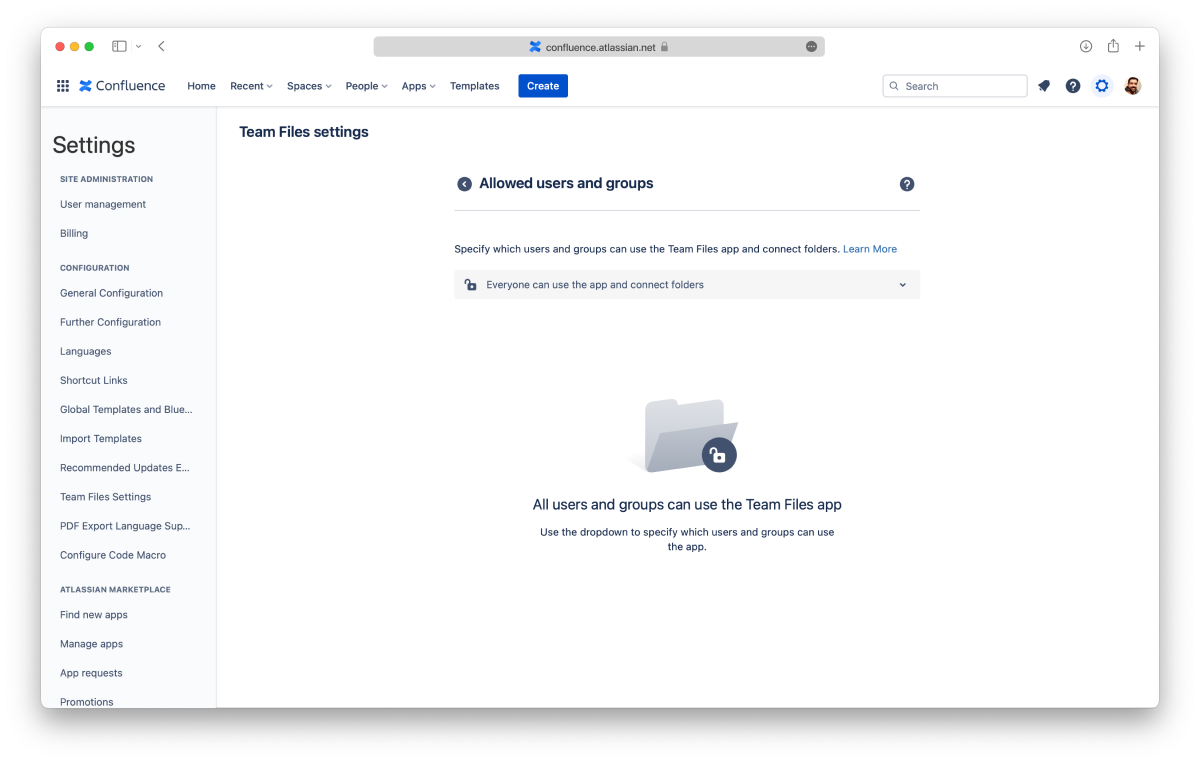
In the "Users & Groups" tab, you can see the current settings. There are three main options that you can select from the drop-down menu:
Option 1: Everyone can use the app (default option)
It is the default option and means that every user and group has access to the Team Files app.
Option 2: Everyone can use the app, only selected users and groups can connect folders
Select this option if everyone should be able to use the Team Files app, but only some users and groups can connect folders.
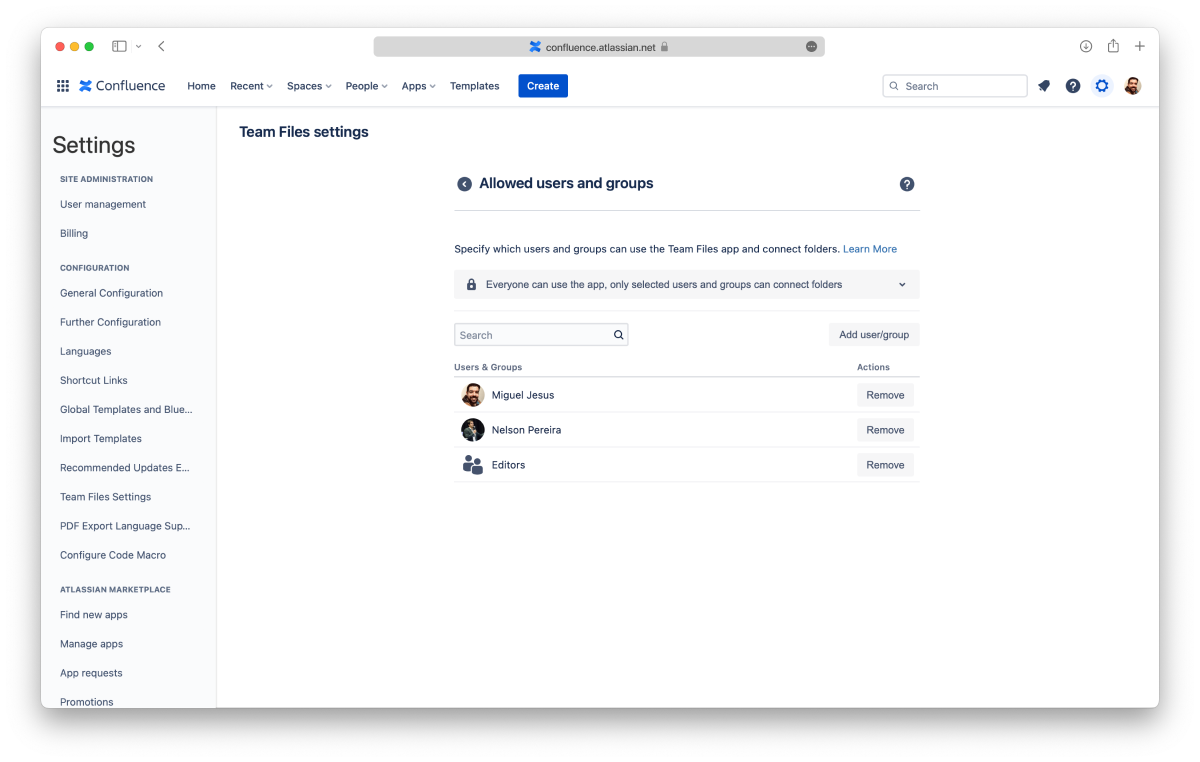
Adding a user or group:
Click the “Add User/Group” button, start typing to select a name, and click the “Add” button. The user or group gets access to connect folders immediately.
Removing a user or group:
Search for the user or group you want to remove, click the “Remove” button and confirm. The option to connect folders is hidden from the user or group immediately.
Option 3: Only selected users and groups can use the app and connect folders
Select this option if you only want some users and groups to use the Team Files app, and specify who can connect folders.
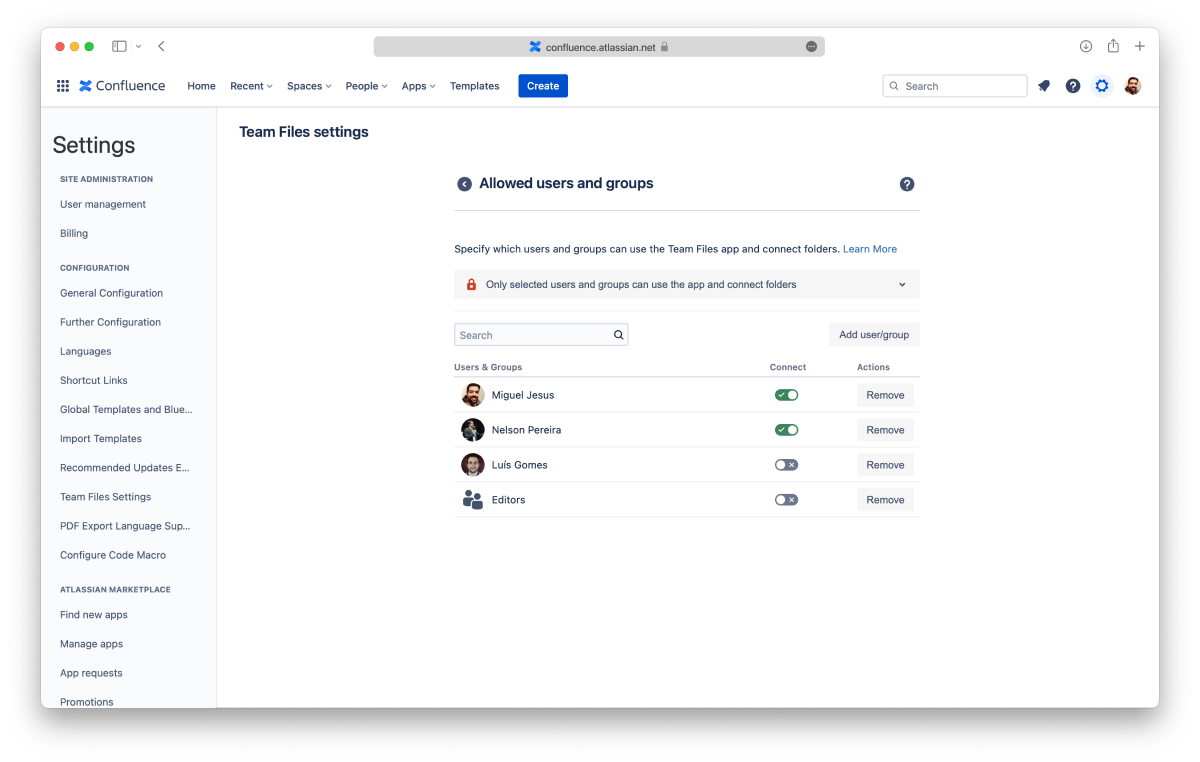
Adding a user or group:
Click the “Add User/Group” button, start typing to select a name, and click the “Add” button. The user or group gets access to the app immediately.
Connect folder permission:
Use the toggle button to determine if a user or group can connect folders.
Removing a user or group:
Search for the user or group you want to remove, click the “Remove” button and confirm. The app is blocked for the user or group immediately.
Wrap-up
On this page, you learned about all the Admin settings available at the moment. As we introduce new features, we'll also add more Admin settings as needed.
If you still have questions or require other global settings, visit our support portal to send us your questions or feature requests. Our team is always happy to help.