About the Team Files app on Jira Service Desk
The Team Files app on Jira Service Desk projects works the same way as in the regular Jira projects, with some extra features. You can attach files and folders to share knowledge with your team, and now you can also do it for your customers.
On this page, we'll show you how to do just that, from the issue view and the file manager, while setting the appropriate permissions, helping you and your team to keep all the information updated and in one place. If you only want to attach for your team, check the https://teamfiles.atlassian.net/wiki/spaces/TFD/pages/383713328/Attaching+files+and+folders+to+issues page.
Attaching files and folders for customers from the issue view
It's straightforward to add the Team Files app to your issues, enabling you to attach files and folders for customers.
Adding the Team Files app to the issue
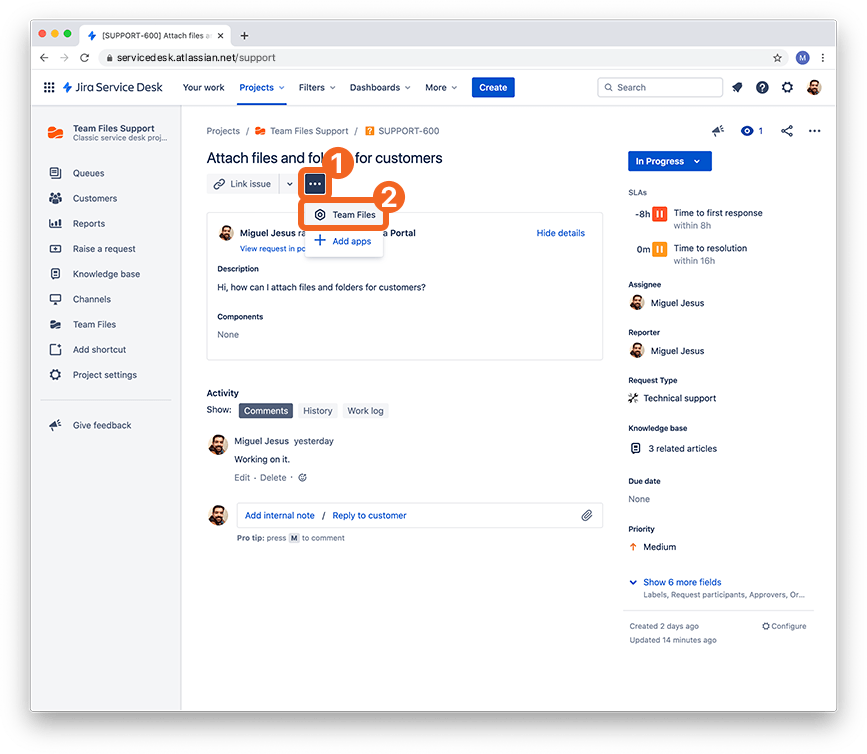
By default, Jira hides installed apps. So the first step is to add the Team Files app to your issue.
Instructions:
In the issue, click the "Add app" button below the issue title.
Click Team Files.
And that's it. The app will load below the issue description and will now always appear when you return to that issue page (but it's possible to hide it again).
Keep in mind that you also need to add the app to the issue when you attach files and folders to issues from the file manager.
Selecting the files and folders to attach
With the app in place, you can now start attaching files and folders.
Instructions:
Click the "Attach for customer" button.
Browse your connected folders in the Team Files dialog. If you haven't connected any, you can do that so now. You can also connect more folders from the context menu as you would in the file manager.
Select the files and folders you want to attach by clicking the checkbox. You'll see them appear on the live preview pane on the right side.
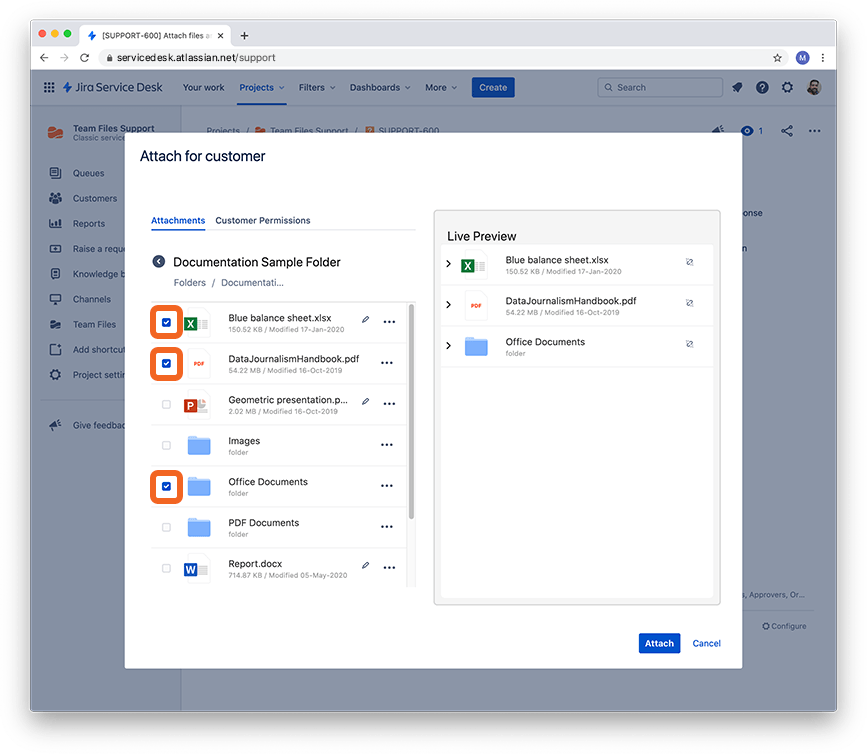
You can now click the "Customer Permissions" tab or click the "Attach" button if you don't need to grant any permissions.
By default, customers can't download or edit files attached to the issue.
Setting permissions
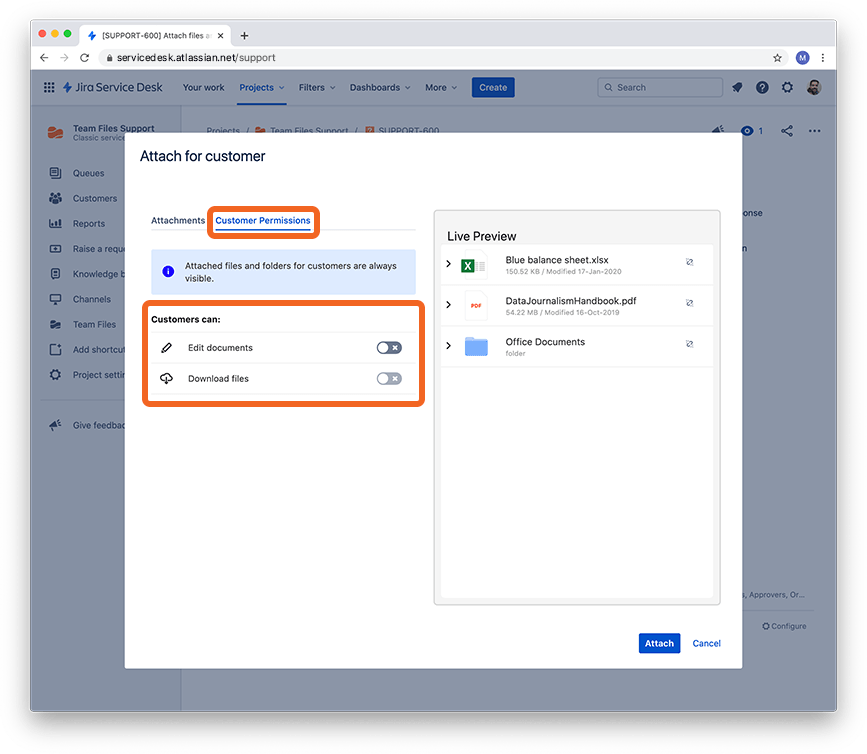
Attached files and folders for customers are always visible, but only editable and downloadable if you allow it.
Instructions:
In the Team Files dialog, click the "Customer Permissions" tab.
Click the toggle buttons to grant the additional permissions to customers.
If you already selected all the files you wanted to attach, click the "Attach" button. Otherwise, click the "Attachments" tab to select more. The permissions you selected will also apply.
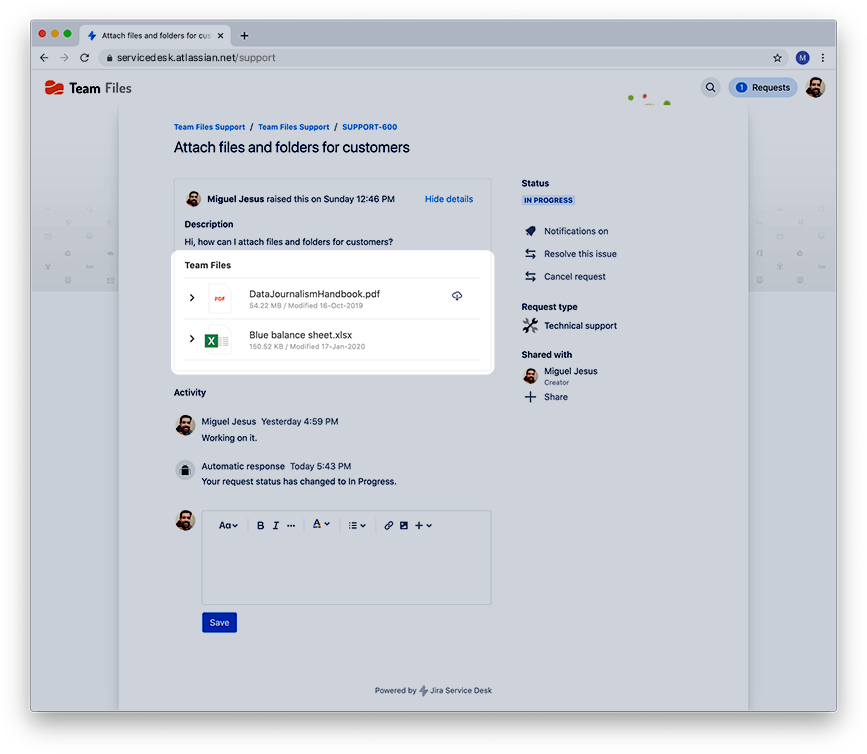
All done. Your attached files and folders are now visible on the issue page and the customer portal.
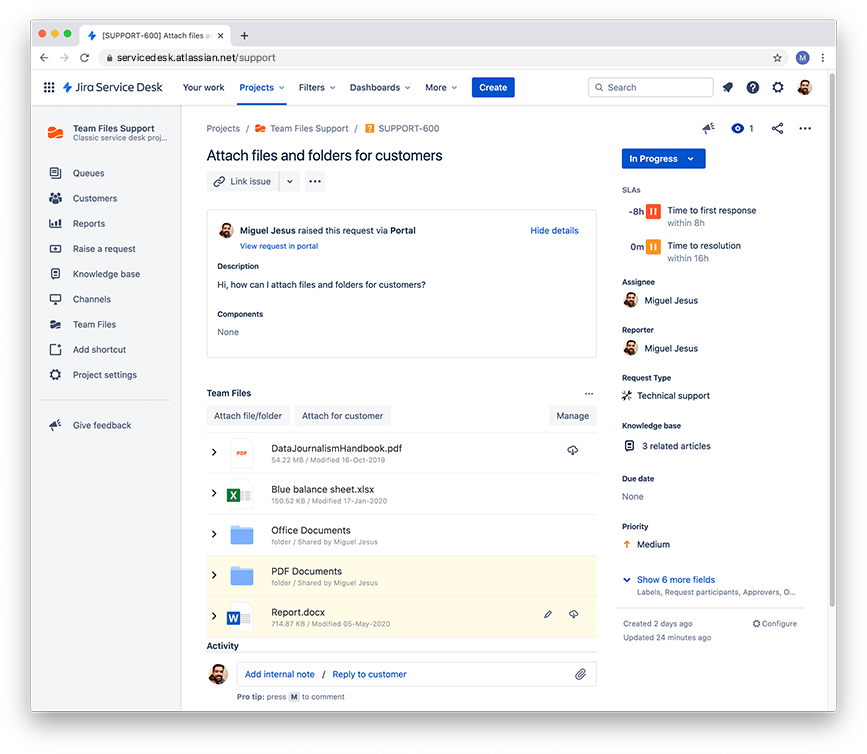
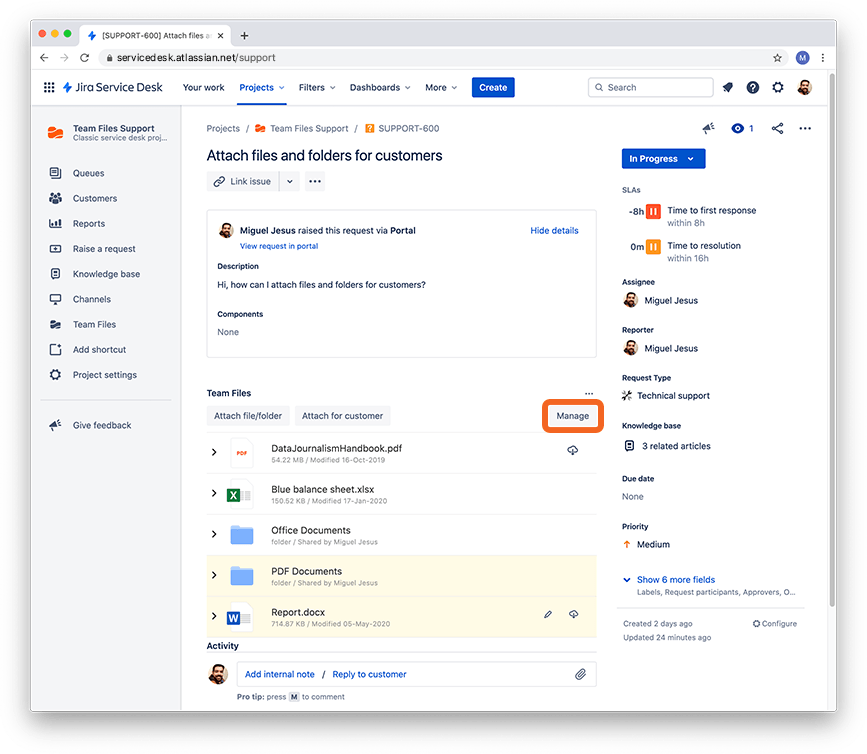
Attached files and folders for customers have a white background. In contrast, the ones shared with the team have a light yellow background, to help you distinguish them the same way Jira differentiates messages for the customer and internal notes.
Attaching files and folders for customers from the file manager
In Jira Service Desk, you can attach files and folders to your issues directly from the file manager, accessible from the sidebar, whether it's for your team or customers.
Selecting the files and folders to attach
Instructions:
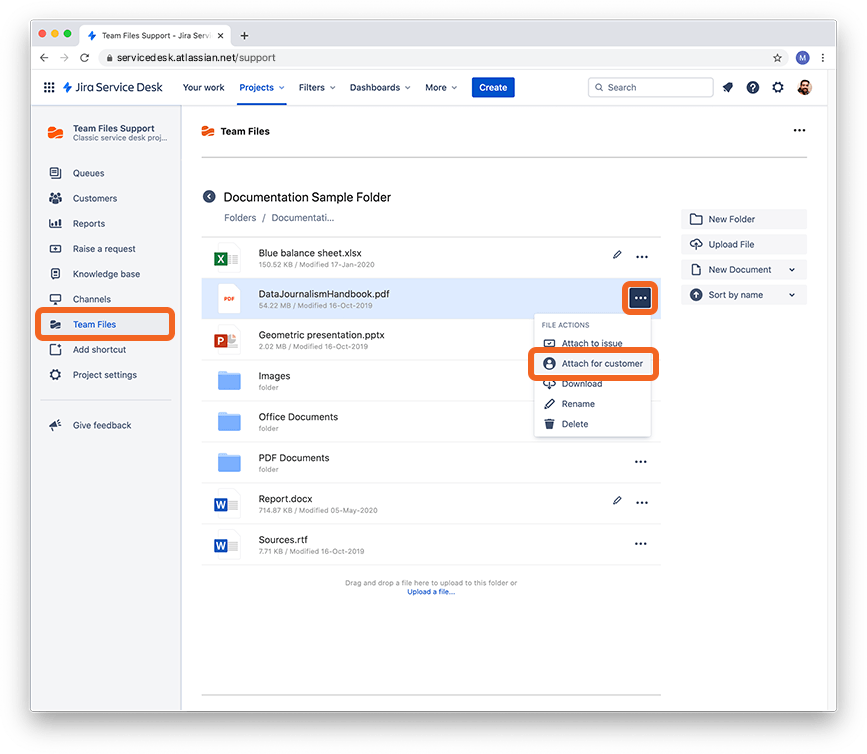
In the file manager, navigate your connected folders until you can see the file or folder you want to attach to an issue.
Open the context menu of file or folder to attach.
Click the "Attach for Customer" option.
Select the issue where you want to attach the file or folder. You can use the search field to look for a particular issue, or even use the JQL search.
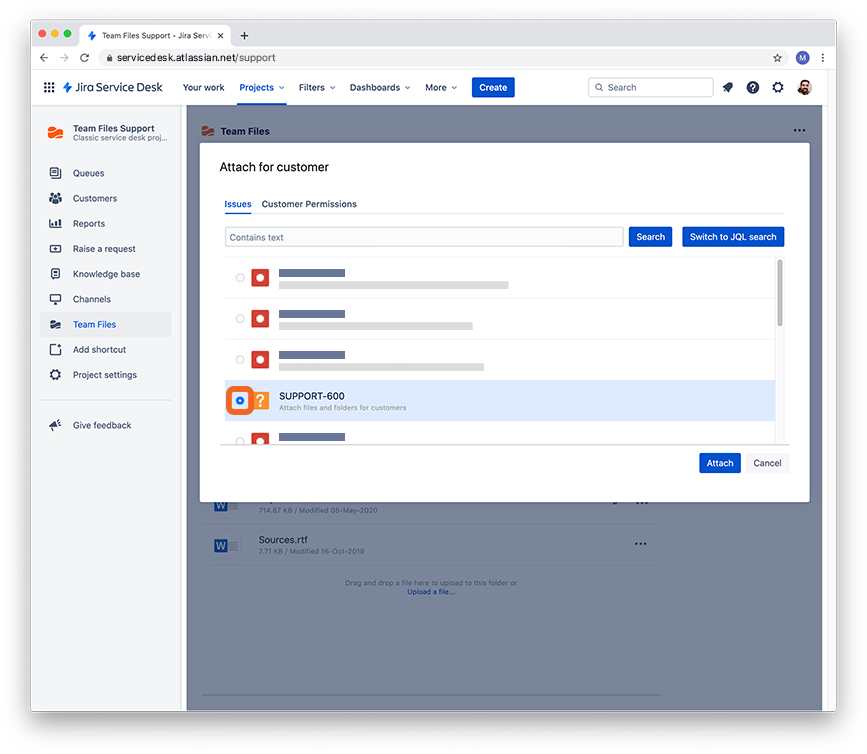
You can now click the "Customer Permissions" tab or click the "Attach" button if you don't need to grant any permissions.
By default, customers can't download or edit files attached to the issue.
Setting permissions
Instructions:
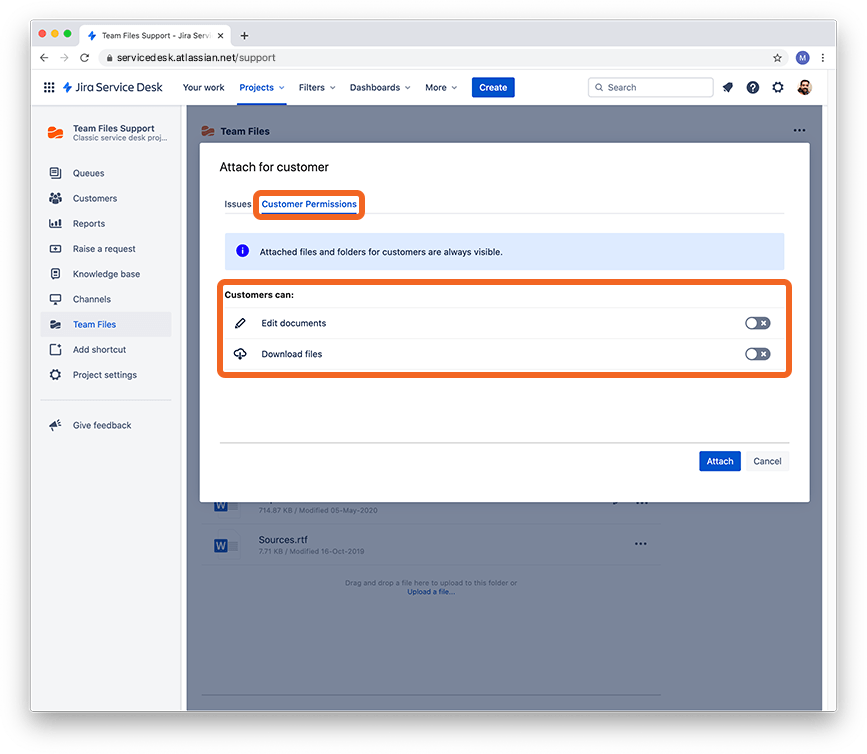
In the Team Files dialog, click the "Customer Permissions" tab.
Click the toggle buttons to grant the additional permissions to customers.
If you already selected the issue, click the "Attach" button. Otherwise, click the "Issues" tab to choose one.
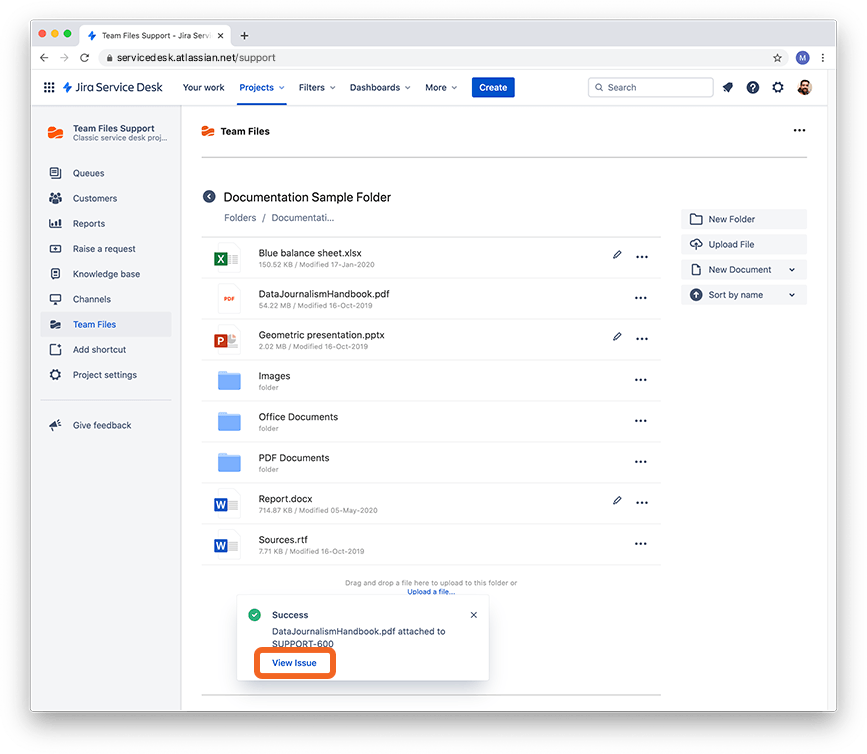
All done. Your attached file or folder is now visible on the customer portal. You can click the "View issue" button to jump to the issue page.
Attached files and folders for customers have a white background. In contrast, the ones shared with the team have a light yellow background, to help you distinguish them the same way Jira differentiates messages for the customer and internal notes.
You need to add the app to the issue page to view the attached files and folders from the file manager.
Removing attached files and folders for customers
At any moment, you can remove specific files and folders attached to an issue.
Instructions:
Click the "Manage" button.
Click the "Unlink" button of the files and folders you want to remove.
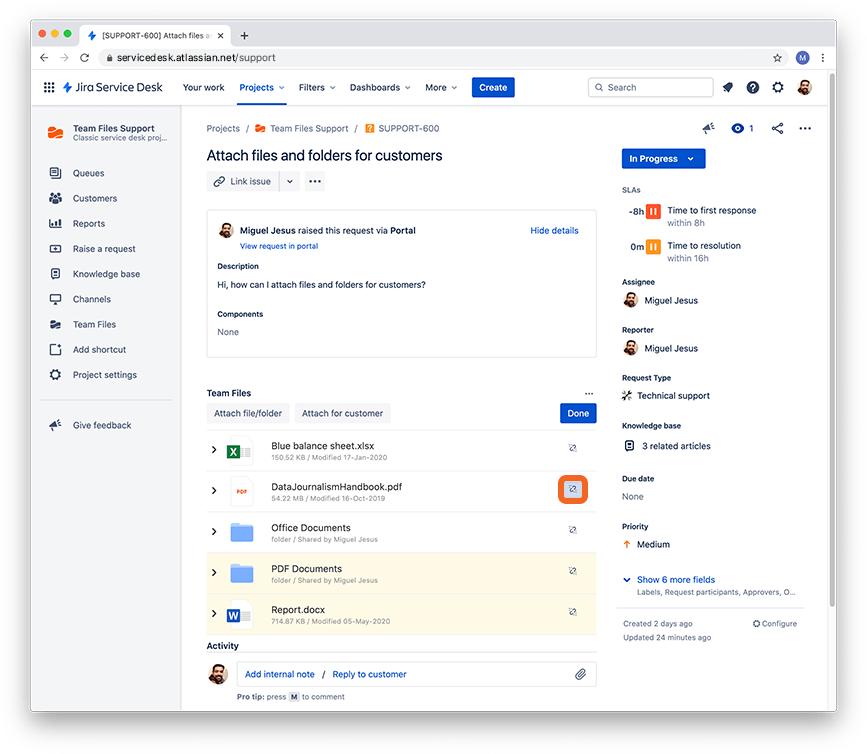
Click the "Done" button.
All done. Your files and folders are safe and sound in your storage place but no longer connected to the issue.
This action is undoable, but you can attach the files and folders again.
Hiding the app
You can also hide the entire app on the issue page while keeping all the files and folders attached to it. Files and folders attached for customers are always visible in the customer portal.
Instructions:
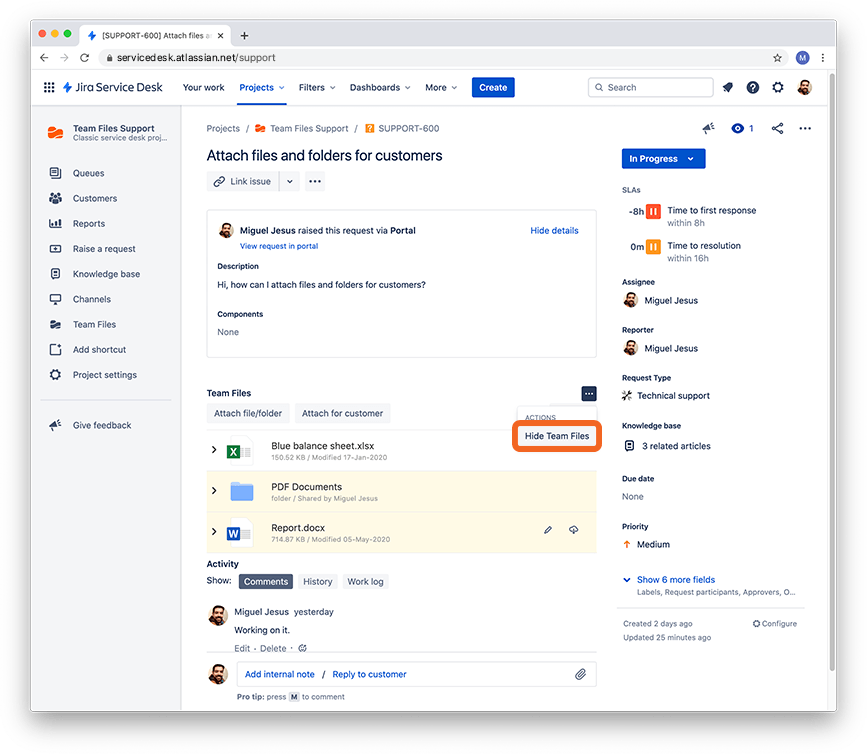
Click the context menu on the top right corner.
Click the "Hide Team File" option.
All done. Your files and folders are still attached to the issue, but not visible. To show them again, add the app back.
Wrap up
Now you know how to attach files and folders for your customers. Don't forget you can attach files and folders just for your team.
If you still have questions about attaching files and folders to your issues, visit our support portal and send us your questions. Our team is always happy to help.